Issuing user rights
Users can be granted access to FloMembers membership management in several ways.
Before you start
Before you can send login permissions to users, check Settings to see if basic information (including organisation's email address) is set.
You can customise the content of the activation message under Settings > Customised settings.
Login permissions
With login permissions, persons may update their personal information. Changes made by a member are saved to the system immediately, that is, changes will not have to be approved by the administrator.
Members can edit almost all of their information. However, a single member can not change or set roles for herself. Also, invoicing information is not yet visible to the member.
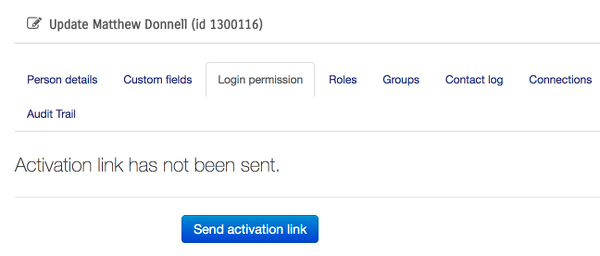
Login permission for one person
- Search for the person you want and go to update his / her information
- Select the Login permission tab
- Send an activation link
- The user receives an e-mail with login link and can edit their own information on the system
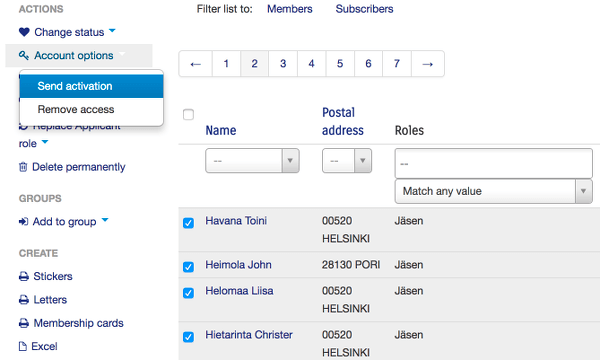
Login permission for many
Select people in the app's main view by checking the box next to the name (or filter the view to, for example, members, and choose "Use All Results" in the upper right corner).
In the left-hand menu, select Account options > Send activation
Read-only access
Anyone can be given a Read-Only-Admin role. In this case, a person can see all the people in the register to the same extent as the administrator, but can not edit this information.
However, the Read-Only-Admin user can send emails to members.
Administrator rights
If you want to give person access to view, as well as edit other information, follow these steps. The system automatically sends the activation link to the new administrator.
Admin role for one user
Find the person you want and go to update his / her information. Give him / her the Admin role in Roles selectbox and save the changes.
Admin role for many
- Search the person(s) you want in the main application view
- Select person(s) by checking the boxes next to the name
- In the left-hand menu, select Actions > Add role > System > Administrator